Showing posts with label Preparedness. Show all posts

Sunday, December 28, 2014

The Economics of Laundry

     Washing laundry at home is a significant use of water, accounting for up to 40% of total household water consumption. This is partially due to the incredible water demands that a typical top loader uses, 40-50 gallons per load! After a year spent going to the laundromat and being increasingly disgusted by the cost and how poor a job the "high efficiency" washers did (after all, how high is the efficiency when the machine doesn't do the job it was designed to do?) we have returned to using a wringer washer. I spent our early married years using a wringer, we've also washed clothes by hand with a plunger and scrub brush- which is hands down the cleanest our clothes have ever gotten.

     The wringer washer takes 16 gallons to fill, in that water I wash at least 3 loads in succession beginning with the lightest/least soiled clothes and progressing to dirtier/darker clothing. As each load is wrung it is put in a bucket or basket, after the 3-4 loads are washed the tub is refilled with rinse water, each load is rinsed, wrung and then hung. The rinse water then becomes the wash water and the cycle starts again. To fill my particular clothesline I can wash 6 loads, so water consumption for me equals 48 gallons (16 gallons to wash, 16 gallons to rinse which is also the next 3 load's wash water, and 16 more gallons to rinse.) That works out to 8 gallons per load of laundry.

     To my rinse water I add a splash of vinegar, we don't like our clothes coated with synthetically scented petrochemicals, then we line dry. In the Winter (which here is mostly rain) we use lines strung on the porches, drying racks indoors and/or lines strung through the living room. It takes around 12 hours for jeans to dry, but that's balanced by increasing humidity in the house and the fact that my kilowatt usage is zero.

     I like that our laundry method leaves a gentler impact on our planet, but I like the cost savings even more. We were spending around $30/week at the laundromat. Should we want to take our laundry system off grid this washer could be converted to bicycle power in about an hour. I found one of my wringer washers on Craig's List and the other at an auction, I paid $75 and $125 for mine. I can't image a laundry system that I'd be more pleased with than this, it has everything: clean clothes, low energy use, and very low water consumption!

Friday, December 26, 2014

Increasing Tilth


     The holiday season is past and our minds immediately turn to garden plans and other Spring endeavors. We are blessed to have relatively fertile soil for the area we live in, so much of the land here is burned out due to ignorance about soil amendments and crop rotation. Our soil is clay loam and we began increasing tilth as soon as the garden was turned for the first time. Improving soil obviously benefits the gardener by increased sizes and yields and it is an easy labor. The first thing to understand is how essential nitrogen levels are, nitrogen is the building block of plant structure, having a deficiency in this area with give you stunted, yellowish plants. Some of the organic methods we've used to raise nitrogen levels are:

  1.  The addition of  composted manure (we use composted horse manure from the stable where our daughter rides).
  2. Growing plants that boost nitrogen such as beans and peas. We will avoid planting corn especially because it depletes the soil rapidly. We tried a test plot of corn last year and the results were disappointing.
  3. Adding coffee grounds, either composted first or washed grounds directly. Washing first ensures that you aren't changing the pH and making your soil more acidic, obviously if you want to change the pH then don't wash the grounds first. 
  4. Plant borage, I haven't tried this one but it would work for a cover crop (as would oats or rye) that you till back into the soil.
     Improving soil organically is a process, not an event. Every year you will see soil improvement, changing from a clay color to the deeper richer black the denotes optimum fertility.


     In more immediate news, the sap will begin rising shortly and we'll be tapping again! Though we have more taps to put in this year than we did last year, it will still fall dismally short of what we used to do. You can read about that here and here, but it's a skill that we value and want to keep alive for the children. Because we won't have the quantity that we're used to my thought is to store the sap in the freezer until we have enough to fill the cast iron pot and then boil it down outside and finish in the house. That's the tentative plan anyway. Immediately on the heels of syrup season will be a brief window and then early garden things can be planted. My garlic is doing well and I think I'm going to divide my comfrey into 3 plants instead of the behemoth it currently is. I'm excited to begin the life cycle all over again, it never grows old. 


Thursday, August 25, 2011

Domestic Economy


Summer is slowly, almost imperceptibly winding down; I can feel the change in the air though the workload is still as heavy as it ever was. We finally finished canning green beans, but the corn and carrots are far from done. We try to do a few canner loads every day and that way it isn't overwhelming and the jars do add up little by little. I'm thankful for the ease and convenience of having home canned foods on the shelf, meals can be made in a hurry and I know they're wholesome. I want to can some corn with red and green peppers in it, we'll add that to cornbread sometimes and we really like it that way. I also want to make a batch of salsa using all Green Zebra tomatoes, green salsa will be different and I do get tired of the same old things all the time. Home canning is a relatively recent invention, at least canning as we understand it today is- though people have been preserving food for later use since time immemorial. Our understanding of cooking has also undergone a radical change in the last hundred years. It’s rare today to find a woman who cooks meals for her family at home, much less a woman who has the knowledge of how to cook from scratch. We’ve gone from a nation of self reliant women to a nation of women who don’t cook or can’t cook anything more involved than Shake-n-Bake chicken and Stovetop stuffing. Obviously there are multiple nutritional benefits to cooking wholesome food from scratch, but there is also the satisfaction of knowing that you aren’t relying on Proctor & Gamble or SaraLee to decide what your family ought to eat.


By the same token, relying on a lot of "labor saving" devices might prove unwise if you are unable to cook without them. My "modern"kitchen equipment consists of a blender and a Victorio
Strainer (we just got the Victorio this summer). That’s it. All of the canning/preserving we do is done with those 2 tools, we dice all fruits and vegetables by hand and cut corn from the cob with a knife. We've canned 430 jars this summer so it is feasible to do all this without a lot of extra gadgets. Our philosophy has been to learn to do jobs the old fashioned way with the least sophisticated equipment and only then switch to more modern methods/equipment. If nothing else this certainly makes us appreciate how easy we have it! I think that it's a beneficial exercise to study old cookbooks and try to cook sometimes using these receipts and ingredients that our Foremothers would have used. Maybe we will never find ourselves in the position of needing to rely on these books and methods, but it's certainly better to be prepared and never need the knowledge than to find ourselves in a desperate situation with "if only" on our lips. Several receipt books that I enjoy perusing are Miss Beecher's Domestic Receipt Book 1850, The Great Western Cookbook 1857, The Frugal Housewife 1830 and The New England Economical Housekeeper 1845 . In addition to the usual recipes you will find directions for cutting up and preserving meat, keeping flies out of your house, remedies for illness, how to choose a domestic servant and other quaint advice. My plan is to print these books out and put them in pages protectors in a 3 ring binder, I prefer browsing through an actual printed book rather than on a computer screen. Today is the day to turn our energies toward acquiring useful skills that will serve our families whether it be canning or cookery, sewing or knitting, animal husbandry or gardening.
Tuesday, July 19, 2011

Candied Ginger Blueberry Jam


We'll have a new culinary experience this winter when we finally get to eat the Candied Ginger Blueberry Jam that I made last week. I've never really liked blueberry jam, most recipes call for too much sugar for my taste, but since I tweaked this recipe extensively I think that I might actually enjoy it! Here's the recipe if you'd like to try it, this yields 7 half pints.

4 heaping cups smashed blueberries

2 cups sugar

1 1/2 teaspoons cinnamon

3/4 teaspoon nutmeg

Combine ingredients and allow to set for 1-2 hours
Add a heaping half cup of diced candied ginger

Heat slowly on stove until very hot but not boiling

Set aside and in a different kettle bring 1 cup sugar, 1 box sure-jell lite and 1 cup water to a brisk boil.

Add contents of sure-jell kettle to the blueberry kettle

Bring to a boil stirring constantly
Remove from heat and place in jars

Can in a boiling water bath canner for 15 minutes

I made 2 batches of this jam and then we canned the rest of the blueberries like I wrote about in the Canning 101 post. I think we got 11 quarts and 11 pints. We are also in the thick of canning peaches which came right on the tail of cherries. Aleks told me that the peppers are almost ready, they will become salsa and Cowboy Candy *and* we've got green beans coming! I think this is why most farm families (those who can anyway) really look forward to winter. :-) The pace is crazy all through summer and autumn, but oh is it worth it!
My one canning shelf still needs to be taken outside and scrubbed and then it's getting a fresh coat of paint. Until then there are jars of food completely filling 2 cupboards and much of the counter space. I feel rich!



Friday, July 15, 2011

Home Canned Fruit 101


If you're interested in learning to preserve food at home, canned fruit is the perfect place to start. Canning fruit is easy to learn and requires the least specialized equipment, perfect for the beginner! An excellent resource for all things canned is the Ball Blue Book, they walk you step by step through canning peaches; however, my method is slightly different than theirs and yields a vastly superior product. Generally fruit today is canned using a sugar/water syrup the proportions of sugar making either a light, medium or heavy syrup. Canning fruit with water necessitates adding more sugar since you're in effect making "fruit soup"; the overall effect is a watered down, super sugary, vaguely fruit tasting product. My method is easy to implement and I think you'll be pleased with the result.

1. Wash fruit to remove pesticide, bugs and unripe/overripe fruit.


2. Peel and slice fruit if needed (such as peaches) most berries can be left whole.


3. Layer fruit and sugar in a mixing bowl or bucket. I use 1/3 cup sugar per pineapple and 1/2 cup sugar per quart of Black Raspberries for instance. The amount of sugar is a personal preference and some things, like rhubarb, need more sugar.


4. Cover and allow to set at room temperature for 12-18 hours. Fruit doesn't juice up well in a refrigerator or other cold environment.


5. Place fruit in jars with a slotted spoon and top off jars with reserved juice.


6. Affix lids and can for the amount of time specified in the Ball Blue Book.


That's it! If you're used to canning fruit using the syrup method you won't find switching over to be difficult at all. Allowing fruit to make its own juice really makes sense when you think about it!


Sunday, June 26, 2011

Mother's Kitchen

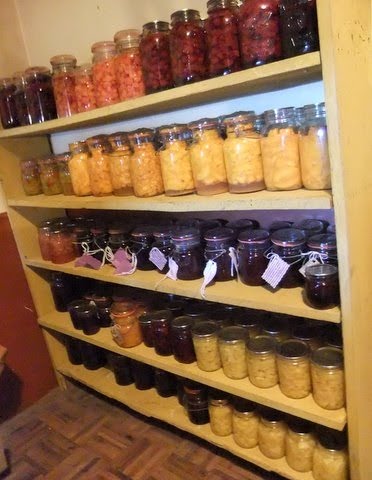
Hello friends, I've been rather neglectful of this blog lately. Summer is a very hectic time for us and leaves little time for virtual reality when concrete reality in the form of produce makes faces at me everyday begging to be put in jars. We're complying at a breakneck pace but still, some days it feels like drowning. Things will settle down around October and then I can engage in other pursuits like sewing and knitting. On especially stressful days I try to remind myself to be doubly thankful for so much food and for the ability to preserve it. Some people just aren't able to put the harvest by and have to rely on grocery stores. That's a picture of my canning shelf (square nailed and mustard milk paint, Tiff :D) it's loaded with: blueberries, dark sweet cherries, light sweet cherries, peaches, rhubarb, Cowboy Candy, mulberry/black raspberry jam, blackberries, pineapple, mulberry/apple jam, black raspberries, peach jam, Lemony Sticky Sour Cherry Jam and blueberry/candied ginger jam. It's only a fraction of what we have canned and an even smaller fraction of what we will can. All of the canned dry beans, corn, green beans, carrots and most pickled things are stored elsewhere. I look at it and I feel rich. :-) I know that we will eat well this winter regardless of what happens with the economy and that gives me a peace.
We have many things that grow wild here and I feel obligated to preserve them since God has provided them. We have an abundance of mulberry products because we have mulberry trees, the black raspberries grow wild as well so they get put in jam, we will have chokecherries that will become waffle syrup and maple trees to tap in the spring. If I would neglect to take care of what has provided for us for free, then how could I ever complain about God's provision for us? If it's here and I'm able, then it goes in a jar. Our Forefathers understood this principle, that we must labor in season to provide for ourselves out of season. Modern dwellers have become accustomed to relying on an outside entity to maintain life, that's risky business in this day and age.
Take care, I hope you're enjoying your summer!

Monday, August 23, 2010

I Am In Canning Paradise


We have a lot going this week in the canning kitchen. Over the weekend we canned tomato juice-21 quarts, salsa-10 pints, chokecherry/peach jelly-10 half pints and the Cowboy Candy that I blogged about before. This week we have more of all of the above to can as well as pears, more peaches (hopefully),


and Tennessee Sweet Potato Squash (that's it above, they're huge) and Pie Pumpkin. I'm canning both the squash and pumpkin in a sugar syrup, the pumpkin will have cinnamon and nutmeg added, then you can open a can and voila'! pumpkin pie, pumpkin muffins, steamed pumpkin pudding, pumpkin bread, the list is almost endless. I will can some pumpkin plain because we like it in Winter Vegetable Chowder (that has parsnips, carrots, beets, squashes and pumpkin). I'd like to can beef tips this week, but I might not get to that. I love canning but the sewing suffers when I'm busy putting things in jars and the canning suffers when I'm sewing a lot. Such is life. There isn't enough "me" to go around some days. :-) I put an advertisement in our local newspaper to purchase canning jars and over the past few weeks I have acquired about 600 more jars, there are jars *everywhere*! We have hundreds of jars filled already and plans to fill most of the rest. Life is busy, work is good, I am happy.

Saturday, August 21, 2010

Cowboy Candy


On the canning docket today was Cowboy Candy, a yummy blend of hot peppers in a bread and butter pickling sauce. It's good on hotdogs, burgers, scrambled eggs or poured over cream cheese as a cracker dip. I am a complete wimp about hot peppers but I do like this!


Cowboy Candy
12 cups of pepper rings: bell, jalapeno, sweet banana, chili, any peppers that you like or if your name is Reber or Shumway then add lots of habanero or cherry bomb. :-D
4 cups of onions of onions
2 1/4 cup vinegar
1 1/2 cup or water
6-8 cups of sugar (8 cups if you like it sweet)
2 TBS of mustard seed
2 tsp of turmeric
2 tsp celery seed

-Wash and cut peppers & onions into thin slices and put in a large pot with the water and vinegar...bring to a boil
-Reduce heat & simmer until tender, about 10 minutes
-Add remaining ingredients
-Bring back to a boil then reduce heat and simmer for another 10 minutes
-Pack clean, hot, sterilized jars and lids leaving 1 inch headspace, adjust lids.
-Water bath can for 20 minutes
Yields about 7 pints

Wednesday, July 28, 2010

A Busy Day in the Kitchen

We've had a busy week in the kitchen putting things into canning jars. Hot, tiring work to be sure, but I know the reward will be worth it. Katie canned a canner load of Rattlesnake pole beans this morning, our first of the year. I was working on Rebekah's birthday presents while she did that and then we canned blueberries and pickled heirloom beets this afternoon/evening. Our beet varieties are: Chioggia, Golden, Lutz Winter Keeper. I don't think I'm a huge pickled beet fan, but they will add variety to the dullness of Winter's protein-heavy repast. I think we're about finished with the blueberries, I ought to make more syrup since what I did make is making its way to New York before long and I have none left for us. We'll see, I know we'll be elbow deep in peaches tomorrow and/or Friday and I don't want to bite off too much. This is our Pickled Beet recipe, it's from 1911.
-------------------------------------------------------------------------
Pickled Heirloom Beets
1. Wash beets and trim off beet greens. Dispatch a child to feed the greens to the pigs; meanwhile leave roots and 1 inch of stems and cook until tender, about a half hour more or less.
Drain beets, cool and peel. Next, admire them on the plate.
2. Cut into slices or cubes, place in jars and pack them in but don't crush them. Then admire them some more and call all of the children in to remark on the pleasing aesthetics that beets entail.
3. In a separate kettle combine: 4 cups cider vinegar, 2 cups brown sugar, 2 cups water, 1.5 teaspoons canning salt, and in a spice bag put 2 cinnamon sticks, 12 whole cloves and 1 teaspoon whole allspice. Add spice bag to vinegar/sugar and boil for 5 minutes or the amount of time that it takes a 4 year old to tell you about the presents that she wants for her birthday which is still 4 months away. Remove spice bag and ladle syrup over beets in jars.

4. Put bands and lids in place and can in a boiling water bath canner for a half hour. Watch the storm roll in as you frantically grab the laundry from the clothesline with clothes pins flying every which way. Let it occur to you at 5:30 that you have nothing prepared for Supper and call for pizza.

Be thankful for everything that was accomplished in a day's time and doubly thankful that every day isn't like today. :-D

Monday, July 26, 2010

Using bail canning jars safely in the 21st century

The home canning authorities no longer recommend using bail lid canning jars, their official ruling states that only modern bands and lids are safe. However, I'm sure that I can't be the only person on the planet who wants to use these for something more than a button jar, so here is a step by step tutorial to ensure your safety.

1. Bail jars need 3 pieces to function: the jar, the rubber gasket and the glass lid. The jar and lid must be without chips and the gasket should be free from weak spots or cracking. I buy boxes of gaskets from Kidron Town and Country store but Lehman's also sells them.

2. After jar is filled, using recommended head space, wipe any food residue from the jar and stretch the gasket over the mouth of the jar. There will be a "shelf" that the gasket rests on. Make sure that the gasket is flat and not twisted.

3. Place glass lid over gasket and put bail closure in place.
4. Process for recommended time and allow to rest on the counter for 24 hours and then check seal. To check seal you remove the bail closure and pick the jar up by the lid. The picture shows me checking the seal on a jar of blackberries. Hold the jar only an inch or two above the counter to avoid a broken jar in case it didn't seal.

I only use my bail jars for foods that are canned with the boiling water bath method, I don't use them in my pressure canner. Certain foods need to be pressure canned to kill any botulism spores, but foods canned with a water bath canner aren't prone to botulism. Food spoilage will generally unseal the lid from previously sealed jars, look funky and/or smell bad, any of these will be obvious in a regular canning jar and will be equally obvious in a bail jar. Observing proper safety measures can make using these vintage jars a rewarding experience and less like a death defying act by a crazy women who enjoys flirting with death. :-D

Tuesday, June 8, 2010

It Pays To Can!

This is my most recent Farming Magazine artice, it will be in the Fall issue, enjoy!


Home Canning Saves Money
I was sharing our food philosophy recently when a man piped up and dogmatically stated that home canning is a nice hobby but “you’re never going to save money doing it!” He went on to say that he bought his canned goods by the case load from Save-A-Lot and $.40 a can was cheaper than any home canned goods could ever be (needless to say, he isn’t a Farming magazine reader :-)). So, does home canning really save money? Let’s look at the facts. A typical 600 square foot garden will yield, on average, one pound of vegetables per square foot. Seeds, plants, fertilizer and tools cost approximately $60 amortized over 5 years, using these figures brings the cost of raising vegetables to 10¢ per pound. Obviously if you buy direct from growers or at pick-your-own farms the price is somewhat higher. Canning jars purchased new cost about $8 per dozen, amortized over 20 years brings their cost to 3¢ per jar per year, add the cost of lids (which shouldn’t be reused) and the cost for jar, band and lid is 20¢. Figuring 2 pounds of vegetable in each quart jar brings the grand total to 40¢ per jar, so indeed, canning does “pay”.
Home Canning Assures Quality
Home preservation of food also assures that my family is eating the quality of food that is important to me. Pork raised in China, fed on human waste, at bargain basement prices from my local mega-mart food chain might seem like a thrifty purchase until you factor in the real cost. Some people don’t mind, but I do. Likewise, we raise or buy locally our own vegetables; what goes into my canning jars is naturally grown, non GMO wholesomeness. It hasn’t gobbled up fossil fuels by flying 2000 miles across the country before hitting my plate, in all probability it was picked only hours before we ate it or put it into jars to enjoy this Winter.
What About The Value Of My Time?
Farm wives of a generation or 2 ago didn’t view home canning as a separate, optional activity apart from their regular duties. It was taken for granted that if you wanted to eat in the winter then you worked to preserve the harvest in the summer. The old farm families never accounted for their time or what it was worth. Only today, the modern woman, city dwellers or those new to the homesteading way of life do that. It’s part of the city mentality (and Marxist “labor theory of value”) that they cannot get past the fact that their time is worth money. Back to the 40¢ canned vegetables that my friend buys, why doesn’t he factor in the time he spends in the car and the store plus the gas money he spent to get there? The true cost of the 40¢ can is the number we should really be using for an honest comparison. From all angles home preservation is the healthiest, most economical, environmentally friendly way you can feed your family!
The 13 jars of strawberry jam that we canned yesterday. I do all of my jam in bail lid jars, I only wish I had more! I have never, ever had a seal failure with bail lids, but I've certainly had plenty with regular lids. The lids today are made so cheaply (like everything else) compared to lids 20 years ago and I think that's why they fail so often. I want to try these lids.
I am canning lemonade concentrate today, it's on sale locally and will be a nice treat this winter.

Tuesday, June 1, 2010

Of vintage canners, planting by moon, and 1940's rationing

I wanted to blog about everything that doesn't have to do with Katie's birthday today, mostly farm and kitchen related happenings. I needed a second pressure canner, so many things take 90 minutes to process plus the heat up and cool down times that 7 jars can take a few hours all told. New pressure canners cost a bit more than I'm willing to pay for such a thin walled contraption (they say it's to make them heat up and cool down faster than the old style but I don't believe it, it's all about cheap, shoddy goods) so I kept watch for a nice used one and I found this beauty!

I think it dates to the 1930's, it has wooden handles instead of the usual Bakelite. I really think it's cute, or as cute as a pressure canner can reasonably be anyway. :-)


We planted the crops that bear above ground last Wednesday and Thursday, the ground was dry and we didn't water them at all and!!! the plants are up, way up, yesterday morning! That is so amazing! I have never, in all my years of gardening seen seeds do this. Planting by the Moon was one of the smartest gardening moves we've ever made. Above is one of the hills of corn with a bean also up (they use the corn stalks to trellis themselves).

On my way back from taking the garden picture I snapped this picture below. I didn't "artistically arrange" the snaths or the yoke. They rest at the corner of the porch and the yoke does its duty daily in the hauling of water to the pigs, chickens, turkeys and cow. The yoke is surprisingly comfortable, light weight yet strong. Aleks used it this Spring in hauling sap, that was its original purpose but now it assists in water hauling. Following the old ways brings such a sense of "rightness" about it, there's something about doing the same things in the same way that people have been doing for hundreds of years that meets a need that humans have to feel connected to the natural world. There's a peace in it that isn't readily found in our plastic, throw away world.


I dispatched Levi to go take a picture of the Buff Orpington hen with her Chocolate turkey baby, as you can see by the ruffled neck feathers the hen was irritated at the intrusion. She was so anxious to go broody that Aleks gave her a turkey egg and she struts around proudly with her surrogate baby. :-)


Doesn't it look like a little bandit? Chocolate turkeys are very rare, one of the rarest heritage breeds that there are.

And lastly, have you read about the gal who decided to lose weight following 1940's recipes using rationed food proportions? Her goal is to lose 100 pounds and she's well on her way. I thought it was an interesting idea and certainly a worthwhile goal. She lists an authentic recipe for every pound she loses, I think there are 30 some on there now.


Saturday, May 29, 2010

Bone Tired And Ready For First Day's Welcome Rest


The title really sums it up, we're bone tired and ready for the rest that tomorrow brings! The 26th and 27th were the last days this month for planting crops that bear above ground so we p-u-s-h-e-d to get everything in the ground. All together the gardens are about an acre to an acre and a half. We planted these bean varieties (all heirloom, open pollinated): Soldier, Mayflower, Jacob's Cattle, Appaloosa, Papa DeRolla, Christmas Pole Lima, Painted Pony, Snowcap, Jackson's Wonder, Marrow, Cranberry, Butterscotch, Dapple Gray, Rattlesnake Pole, Turkey Craw, and Bible Ruth. We also put in a great quantity of corn, Delicata squash, Connecticut Field Pumpkins, Sweet Meat Squash, Boston Marrow Squash, Moon and Stars Watermelon, Giant Fodder Beets and Sunflowers. Whew! I know that I missed some things but you get the idea anyway. :-)
And then began hay cutting. We have several scythes and cut the hay in short order with them, once you get a rhythm going it goes pretty well. The snick, snick of the blade as it cuts the grass down is a relaxing experience. The whole art of scything is dying, maybe it's already dead, I don't know, but it is a skill worth cultivating I believe. There are American snaths and European snaths and both are different (the snath is the wooden handle). The scythe is the blade and there are different blades for each style of snath and for differing jobs, whether you're cutting hay or trimming brush from fencerows. Your snath must be fitted to you so that you can expend the minimum amount of effort to move your blade across.

We also canned more rhubarb today and will begin on strawberries later this week.


For a bountiful harvest we should give nought but thanks!

Saturday, May 22, 2010

Rhubarb

After taking a canning hiatus last week I decided that I needed to can rhubarb today! We have several different Amish families that we buy produce from but I decided to check the "spinster sisters" that live down the road from us a few miles. I was pleased to see that they did have rhubarb and the asking price was $.50 a pound! The one sister was scrubbing the floor when I got there so she dispatched the idle sister to begin cutting my order. I told her that I wanted enough to can 7 quarts and she brought back 9 pounds.

We washed the stalks and then cut them into 1" slices. For every quart of rhubarb we added 3/4 cup of sugar, I got my 7 quarts with 2 stalks to spare! I mixed the rhubarb and sugar up evenly and let it set for 3 hours. After that I placed the whole mixture in a stock pot and boiled for 30 seconds.


I then spooned the hot rhubarb into warm quart jars and topped off with the accumulated juice from the stock pot. Due to shrinkage we only ended up with 5 quarts, but that's OK as I want to can more this coming week. Then the jars were water bath canned for 15 minutes.

Aren't they pretty?


The health benefits of rhubarb are quite numerous, here is a brief synopsis:


This tart treat has health benefits that will make anyone want to go out and try a few. Health benefits of rhubarb are many, and offer a great amount of nutritional value. Rhubarb in the past was used for fevers and used as a laxative. With the benefit of Vitamin C and fiber, rhubarb offers many other benefits to the consumer. Health benefits of rhubarb are:

1. Can lower cholesterol - With its sweet taste, rhubarb surely is easy to get down. Along with the bonus of tasting good, rhubarb lowers cholesterol. Because of the vitamins and nutrients, this helps reduce the risk of harmful diseases. Rhubarb is a sure thing to take if you are suffering from high cholesterol.

2. Help prevent deep vein thrombosis - Because of the nutrients and vitamins; rhubarb helps prevent deep vein thrombosis. This is a blood clot in your feet that can spread to your lungs if you are not treating it. There are many ways to prevent deep vein thrombosis, but rhubarb is the simplest.

3. Rhubarb stimulates the metabolic rate - this makes it a good for people who want to lose unwanted pounds. The dietary properties are promoted with the usage of fiber and potassium. With the potassium it is said to speed up your metabolism to help you lose weight.

4. Low in carbohydrates - Everyone is trying to find the latest health benefit for fruits and vegetables. The best health benefit of rhubarb is that it is low in carbohydrates. When you have something that is low in carbohydrates, you can feel alright when you accidentally eat more than you intended to.

We did a canning jar inventory and I only have about 30 dozen jars total. :-/ That is really not enough, I've already used almost 1/3 of those and this is only May! I'm keeping my eyes open for auctions where jars are listed so I can bolster my supply. Canning makes me so happy, I love the sight of the filled jars in my cupboard. :-) I love it so much that when my sister was here I dragged her out to the kitchen to admire them, she very dutifully extolled their beauty, lol. :-)

Tuesday, May 18, 2010

A Dream Fulfilled

A dream of mine to own a wood burning cook stove was fulfilled yesterday as I am now the proud owner of the most beautiful stove ever manufactured!
I have been searching eBay and Craig's list for months in the hopes of finding a suitable stove. I found several that fit the bill but they were in Michigan or Texas or Tennessee and without a truck it just wasn't feasible. Last friday I found this one on eBay for a really nice price but it was in Albany, so I called my travelin' sister to see if she had business up that way. And she did!!! She had to pass within 20 miles of where the stove was in order to pick up her son from college, can you believe it? :-)

So it was hastily arranged for her and a sweet friend with a truck to pick it up for me on Saturday and then they turned around and delivered it to my door yesterday.
They also brought a load of goodies from my folks: a double bed with mattress, box spring, head and foot board, lots of books and magazines, sheer curtains for my livingroom, some shirts for Katie..... :-)


The stove needs the fire bricks replaced and it needs an over rack, but it's pretty well ready to go other than that. I am now in search of a couple of cast iron waffle irons, even the thought pleases me, just thinking of waffles, lol. I am so blessed and happy, I can hardly believe it!

Friday, May 7, 2010

Canning Dry Beans


Since the girls and I have been canning dry beans this week I thought I would post a step by step tutorial for anyone who would like to give it a go.


  1. Buy 1 pound bags of these 5 dry beans: great northern, navy, black, pinto and black eyed peas.
  2. Cover beans with water and soak overnight.
  3. Next morning rinse beans under running water.
  4. Put 2-2.25 cups beans in each quart jar (this recipe makes 10 quarts).
  5. Add salt or not, I don't FWIW.
  6. Fill jar with hot water leaving 1" head space.
  7. Pressure can for 90 minutes at 10 lbs pressure.

Voila'! If I want baked beans I open a jar, rinse, add 1 cup ketchup and 1 cup brown sugar, salt & pepper and there you go, homemade baked beans! If I want bean soup I open a jar but don't rinse them and add the rest of my soup ingredients. If I want Minestrone or Vegetable soup..... this is probably the #1 best thing I can for versatility. Most recipes have you cook the beans before canning but that makes for mushy beans and I don't care for that.

We also canned some with the barbeque sauce and bacon in the jar. To do that you put your beans in the jar with 1.5 cups of sauce and fill the rest of the way with water. Can the same time and pressure as above.

We have beefy mushroom soup going now for the last canner load of the week, we're taking this weekend off, I think. I'm t-i-r-e-d!

Monday, February 8, 2010

Well, darn it!

When I was hanging up laundry yesterday I happened to notice the deplorable state that Mr. G had let his socks slip into. He's only had these socks a month, but they were so foreworn that I mistook them for his old pair. Since they are wool and cost $9 a pair they are prime candidates for darning. Here is a step by step tutorial for anyone who would care to add this forgotten skill to their arsenal of frugal living tips.

Step 1: Find a forlorn pair of socks in need of some TLC and a ladle. I don't have a darning egg and the suggestion of using a lightbulb seems unwise. If you happen to get a little slap happy with the darning needle you might be tempted to say something a bit more robust than "darn it".
Step 2: Place the ladle in the sock to give yourself a good surface to work on, the fabric should not be so tight that it's stretched.
Step 3: I like to begin by taking running stitches around the rent, about a half inch out from the hole, to stabilize the tear. Not everybody does this but it makes it easier for me to keep my stitches even. Leave a 4-5" tail trailing, you will weave this in later.
Step 4: Begin sewing the warp threads using a running stitch. When you come to the rent just take a long stitch over it and continue with the running stitch on the other side.
Step 5: Now you can begin to weave the weft threads over and under the warp that you've just created. Try to make your stitches lie close to the row below. I've purposely woven loosely here to give you a better picture of what you're trying to accomplish.
Step 6: Weave in your ends, tying creates uncomfortable lumps so weaving is preferred. I darned this sock in "Northern Ireland" colors so you can see better.
The completed sock with a new lease on life! :-)

Thursday, February 4, 2010

What do you *need* to be content?

As so often happens, a variety of things happen or are said and the result is a blog post so that I can sum up my thoughts on the subject. I've been pondering "Godliness with contentment is great gain" and "having food and raiment let us therefore be content". That last one is pretty sticky, isn't it? :-) If you had food and clothes and shelter and nothing more, would you be content? Some of the things that sparked this line of thought.

  1. Somebody wrote a letter to the editor in a magazine I subscribe to basically saying that if you can buy superfluous items then you aren't caring enough about starving, homeless or suffering people in your community. Wow. That's a sobering thought.
  2. A neighbor that we've met a few times dropped off 7 blankets here today, that's a nice thought. We have enough blankets for our beds but no extras, everyone has 2 sets of sheets and that's it. No extras. But they had enough extra that they could afford to give away 7 like new blankets.
  3. One of the meme questions had to do with our clothes (how much is homemade and how much we have). The girls have 4 dresses each, petticoats, and a pinafore or 2, the boys have 3-4 shirts and 3-4 pairs of pants/overalls. They have a Winter coat/hat/scarf and socks and that's it. We don't have closets full of clothes that we don't wear. There are several reasons for this: since I sew the majority (not overalls, socks or underwear) of what we wear and there are 11 of us, we're never going to have "too many" clothes as I simply can't sew that fast. :-) Secondly, I truly believe that it's unnecessary and an account will have to be given of why I wanted more when I knew that others didn't even have enough. Again, that's a pretty sobering thought. Historically you'd be looking hard for any but the very wealthiest families to have any where near what most people consider necessary today, why do we need so much?
  4. And this is the biggie. We've been without a van for over 2 years, that means that we don't go places as a family etc. It's been really hard, I mean really. I had my hopes set on buying a van when we got our taxes back but circumstances conspired to make this impossible. I was so disappointed but I started to ponder whether we needed a van or not. I came to the conclusion that we don't. We aren't going to die without it, so while it's a nice luxury, it's not a need.


I may have mentioned Martha Ballard before, but it ties in so I'll bring her up again. I own and have read her diary several times and I recently learned that the diary in its entirety is searchable online. I searched for "beans" and found out what varieties of beans they planted etc. I searched on "knit" and read about what and when they knitted. If you read her diary you will quickly notice how full her days were and how industrious their family was. They worked hard to provide for their needs and I think they were better for it. I'm not sure that our glut of leisure time really benefits us, I'm afraid it only serves to further the disconnect between us and those around us. Who cares about their neighbor anymore? Do we know (or care) who raises our food or makes our clothes? I'm troubled by these thoughts. I don't expect that you will have the answers, but I just wanted to get this off my chest. :-)


The diary is available here.

Thursday, January 7, 2010

The Need To Provide

The snow is falling fast and thick this evening, big snow flakes that drift slowly down because there's no wind. It's supposed to be quite a blizzard, maybe we'll get snowed in! There's a certain romance to being isolated from the world by a thick blanket of snow. :-) I love Winter, I love the stillness and the slower pace, I love the smell of soups simmering on the stove mingled with the wheaty smell of fresh baked bread.
I love the peaceful evenings around the stove reading aloud to the children. It's the time set aside to regroup and plan for the coming year, to pore over the seed catalogs and laugh that we ever could have considered Summer to be hot. It affords the opportunity to help the children develop skills that they will need as adults. A time for every season.........

It's about this time every year, after the holidays are over, that the drive to provide for my family really kicks into overdrive. I'm engulfed by the desire to sew and spin and knit, to assure myself that my own are covered and clothed. Mrs. B is knitting a wool undershirt for her baby and I'm enthralled with the idea of handmade wool undershirts, I want to bring forth the knitting needles and knit myself into a frenzy with undershirts streaming into my lap one after the other. Of course then reality rears its ugly head to snidely remind me that I can't knit.
Well, at least not well enough to actually make something. :-/

My inepptitude is really starting to mess with my self respect. How can I be a real woman if I can't knit wool undershirts? But seriously, I feel the weight of responsibility upon me in this area (as in so many others) because we've chosen to be responsible on a different level than a lot of other people are. If I don't sew, we go naked. If we don't keep a fire going, we freeze to death. If Katie or I doesn't cook, we starve to death. If the chickens aren't cared for or don't lay, we go without eggs. There isn't a back up readily available to fall back on. And don't get me wrong, I wouldn't have it otherwise. I love not being dependent on the outside world anymore than we are. But it does add a certain urgency to the situation. :-)

So, I'll renew myself and think and plan what needs to be sewn and what can be remade or mended. I'll vow to manage my time better and all the while I'll give thanks, really and truly tears streaming down my face thanks, that I have the family that I do and have been blessed beyond measure with the ability to care for them.