Sunday, December 28, 2014

The Economics of Laundry

     Washing laundry at home is a significant use of water, accounting for up to 40% of total household water consumption. This is partially due to the incredible water demands that a typical top loader uses, 40-50 gallons per load! After a year spent going to the laundromat and being increasingly disgusted by the cost and how poor a job the "high efficiency" washers did (after all, how high is the efficiency when the machine doesn't do the job it was designed to do?) we have returned to using a wringer washer. I spent our early married years using a wringer, we've also washed clothes by hand with a plunger and scrub brush- which is hands down the cleanest our clothes have ever gotten.

     The wringer washer takes 16 gallons to fill, in that water I wash at least 3 loads in succession beginning with the lightest/least soiled clothes and progressing to dirtier/darker clothing. As each load is wrung it is put in a bucket or basket, after the 3-4 loads are washed the tub is refilled with rinse water, each load is rinsed, wrung and then hung. The rinse water then becomes the wash water and the cycle starts again. To fill my particular clothesline I can wash 6 loads, so water consumption for me equals 48 gallons (16 gallons to wash, 16 gallons to rinse which is also the next 3 load's wash water, and 16 more gallons to rinse.) That works out to 8 gallons per load of laundry.

     To my rinse water I add a splash of vinegar, we don't like our clothes coated with synthetically scented petrochemicals, then we line dry. In the Winter (which here is mostly rain) we use lines strung on the porches, drying racks indoors and/or lines strung through the living room. It takes around 12 hours for jeans to dry, but that's balanced by increasing humidity in the house and the fact that my kilowatt usage is zero.

     I like that our laundry method leaves a gentler impact on our planet, but I like the cost savings even more. We were spending around $30/week at the laundromat. Should we want to take our laundry system off grid this washer could be converted to bicycle power in about an hour. I found one of my wringer washers on Craig's List and the other at an auction, I paid $75 and $125 for mine. I can't image a laundry system that I'd be more pleased with than this, it has everything: clean clothes, low energy use, and very low water consumption!

Friday, December 26, 2014

Increasing Tilth


     The holiday season is past and our minds immediately turn to garden plans and other Spring endeavors. We are blessed to have relatively fertile soil for the area we live in, so much of the land here is burned out due to ignorance about soil amendments and crop rotation. Our soil is clay loam and we began increasing tilth as soon as the garden was turned for the first time. Improving soil obviously benefits the gardener by increased sizes and yields and it is an easy labor. The first thing to understand is how essential nitrogen levels are, nitrogen is the building block of plant structure, having a deficiency in this area with give you stunted, yellowish plants. Some of the organic methods we've used to raise nitrogen levels are:

  1.  The addition of  composted manure (we use composted horse manure from the stable where our daughter rides).
  2. Growing plants that boost nitrogen such as beans and peas. We will avoid planting corn especially because it depletes the soil rapidly. We tried a test plot of corn last year and the results were disappointing.
  3. Adding coffee grounds, either composted first or washed grounds directly. Washing first ensures that you aren't changing the pH and making your soil more acidic, obviously if you want to change the pH then don't wash the grounds first. 
  4. Plant borage, I haven't tried this one but it would work for a cover crop (as would oats or rye) that you till back into the soil.
     Improving soil organically is a process, not an event. Every year you will see soil improvement, changing from a clay color to the deeper richer black the denotes optimum fertility.


     In more immediate news, the sap will begin rising shortly and we'll be tapping again! Though we have more taps to put in this year than we did last year, it will still fall dismally short of what we used to do. You can read about that here and here, but it's a skill that we value and want to keep alive for the children. Because we won't have the quantity that we're used to my thought is to store the sap in the freezer until we have enough to fill the cast iron pot and then boil it down outside and finish in the house. That's the tentative plan anyway. Immediately on the heels of syrup season will be a brief window and then early garden things can be planted. My garlic is doing well and I think I'm going to divide my comfrey into 3 plants instead of the behemoth it currently is. I'm excited to begin the life cycle all over again, it never grows old. 


Sunday, November 30, 2014

Elisabethe in the 1830s


     Just a few pictures of Elisabethe's new 1830s dress that I mentioned in my last post. It was sewn by her big sister, Kate, out of a pima cotton check that we had from a previous project of mine that went awry. Though I detest sewing pima (and she did too) it does make a nice crisp skirt with lots of natural oomph. Coupled with a few petticoats to give it a nice bell shape and the look is perfectly lovely!


     She is thrilled with it, naturally, and would wear it daily if we let her. I love that about her, she loves and appreciates beautiful things just as she should. :)

Wednesday, November 26, 2014

Thanksgiving Dress in the 1830s Style

      Canning season is mostly over, I ended up with about 50 less jars than I thought I would since I never made applesauce, so we totaled out around 450 jars. After the weight of preserving is lifted then the I-Need-To-Sew-Clothes-Again urge hits, and off we go.


    The girls do keep a running list of whose turn it is to have a dress sewn next and as Elisabethe had her turn skipped a while back it was her turn. Katie took it upon herself to sew an 1830s masterpiece for her, replete with uber puffed sleeves, I couldn't be happier with it. One evening a week or so ago I began to think of all of the dresses that I've sewn through the years for the 6 girls and so we sat down one evening and tallied the number, we ended up at over 90 and are still occasionally adding to the list as our memory gets jogged. But we also noticed that some of the girls have fewer dresses still in their possession than others, I'm trying to remedy that as nobody wants to be the lone girl with 3 dresses when her sisters have 3x that number.


     I've had this fabric for years and have loved it since I bought it, but as it was only 4 yards my options were limited. After ruminating for a while it decided that it wanted to be a fan front, I promptly messed that up and it quickly decided that it would rather be styled into an 1830s bit of loveliness. 


     After her dress was complete I made up a bodiced petticoat based on this illustration from an 1860s Peterson's Magazine. The bodice and yoke are a light weight cotton and the skirt is a much heavier cotton that I hemmed with a "fancy" machine stitch. It gives a nice oomph to her skirts which I love. I basted some 100% cotton lace into the neckline as I love the look that gives; it wouldn't be terribly practical if she were to wear this garment everyday as the lace couldn't take the frequent washings required, but for this project it was perfect. 


     The only thing remaining was to whip up a diminutive pair of pantalettes. I put 3 half-inch tucks in each leg for pretty and truly the sight of them peeking out from beneath her skirts makes me smile. This is such a beautiful, elegant way for a little girl to dress!


     I've decided to begin a new tradition of having a 5x7 framed and hung on the wall every time one of the girls gets a new dress. I wish I had begun this years ago, but since I didn't I will start today. The picture above is the one that I chose to commemorate Magdalena's Thanksgiving Dress for 2014. 


     Too much cuteness is tiring, apparently. 

     Happiest of Thanksgivings from our family to yours! 


Thursday, November 13, 2014

Plugging Away At My Eulogy


 Autumn is having an impromptu meeting with Winter right now in my yard. The sky is pale faced and looks a bit sickly, as though it wishes to put this meeting off for a future date. But it is not to be, snow is hurtling to the ground, not in gentle flakes but in hard bits that sting.


      Today was a good day to make cranberry sauce, so that's what I did. We love homemade cranberry sauce so I'll make one more batch for a total of 14 pints or so. If you'd like to try it you combine 3 12 ounce bags of washed cranberries with 6 shredded Granny Smith apples, skins included but not seeds. Add 6 cups sugar and 4 1/2 cups water, boil for 15 minutes or until berries pop and it looks thick. Remove from heat and let cool, if it's thick enough to suit you then jar it up and process for 15 minutes, if it isn't thick enough then boil it a bit longer.


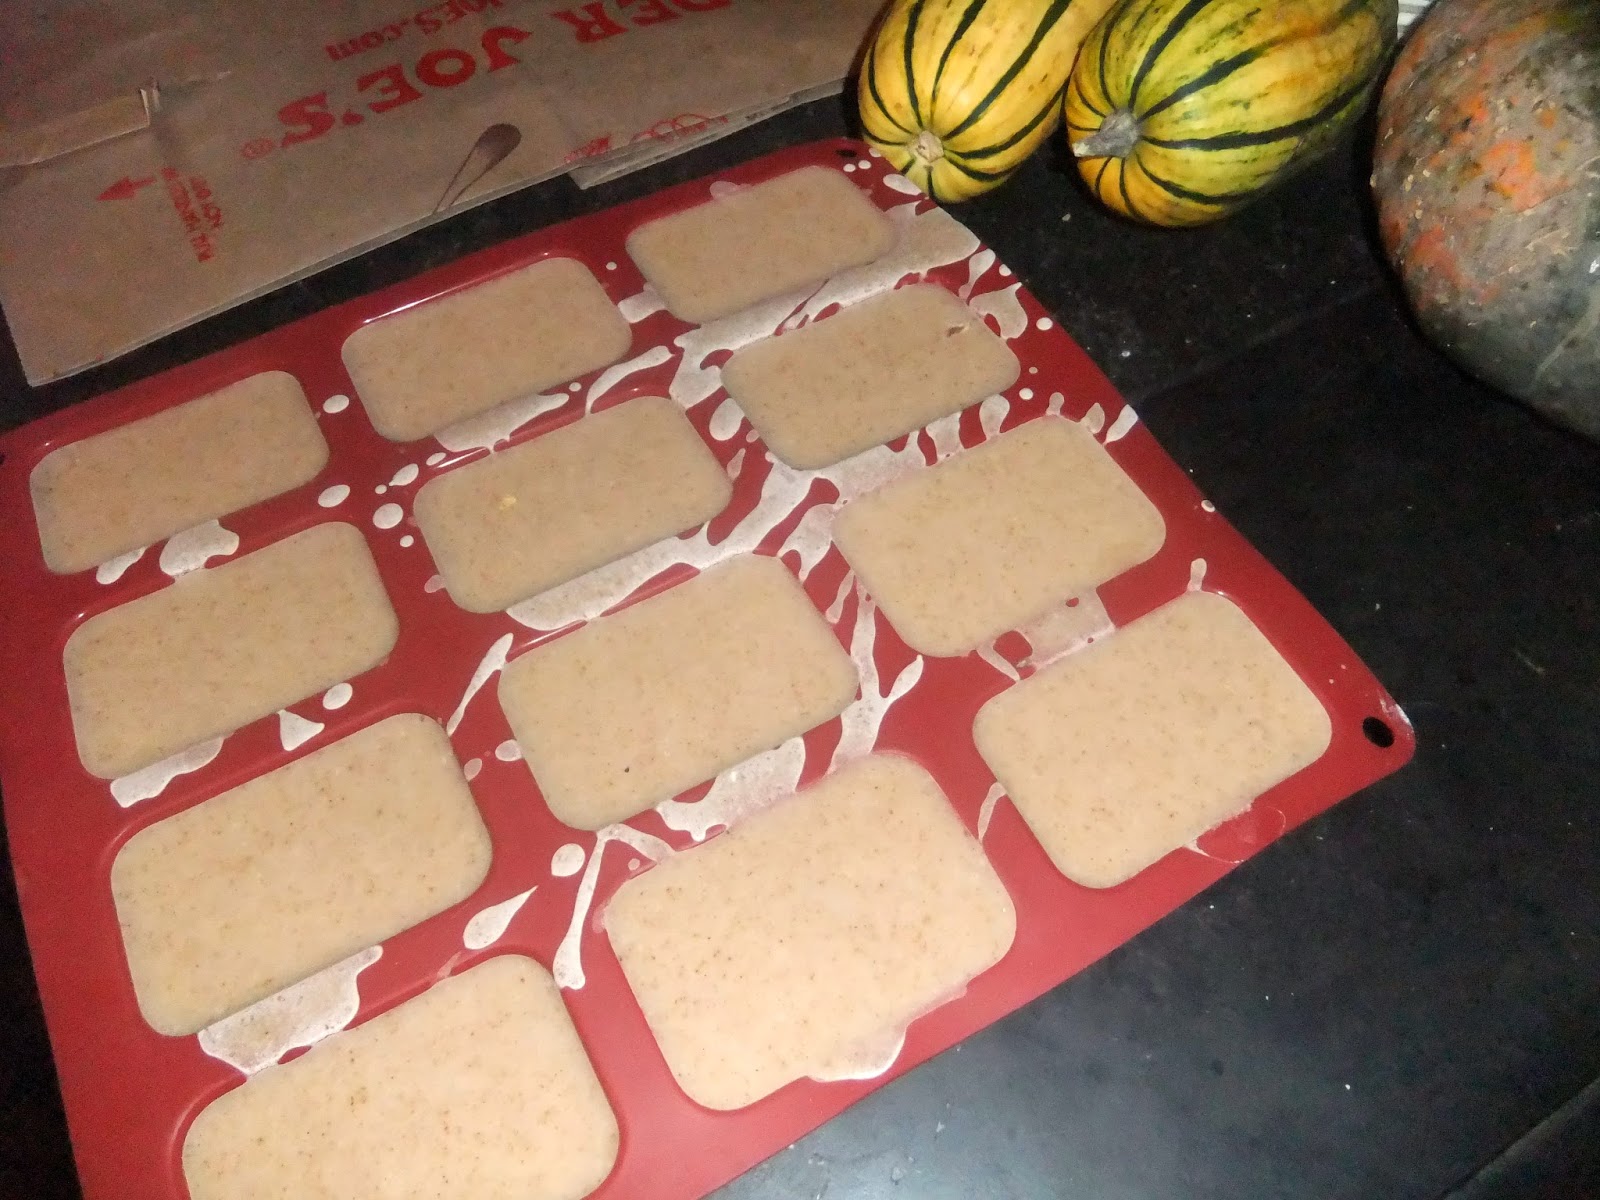
     Lately I've felt the need to make soap again so I've made 2 batches so far, the first was pine tar soap and this last batch was made with comfrey tea and a bit of cinnamon. I like soap making to be an economical venture so I tend not to use expensive oils or much fragrance, fresh soapy clean is perfume enough to satisfy me. I want to get a few more molds and then make enough soap to last until Spring, that's my goal anyway, unless life has other ideas.


    This is one of my canning shelves, the jams, pickles, fruits and sauces are all elsewhere. With the chili that I canned yesterday and the cranberry sauce today I have around 425 jars filled. I do have beans soaking now in preparation for canning them tomorrow and pickles are brining so we'll process those on Saturday..... that will give me about 443 jars. I still have applesauce to do and a few other little things, I think I'll get to 500 jars or thereabouts.


     I read a quote from an elderly lady written around the turn of the century and she said that if a woman saw all the dishes that she would have to wash in her lifetime she'd lay down and die right then. So much of a woman's work is used up, or eaten up, or goes unnoticed as anything extraordinary, but the quilts she had sewn were different. They would be kept and cherished as something that Aunt Jane had made. Aunt Jane was writing her eulogy, though I doubt she thought of it that way. I think of that. What will my children remember about me? That I spent a lot of time on facebook? That I valued forgotten skills? That I sewed their clothes and mended socks? Or that I couldn't make crisp pickles to save my life? Everything I spend time on tattles on what I really value, both good and bad.

     It's so easy to get caught up in comparisons, to think that somebody else's life is perfect or pretty close. And it's easy to think "well, I'd do thus and so if only..." I'd like to encourage not to wait one more day to start writing the eulogy that you want remembered. You probably can't jump right into your dream life, I know that I didn't, but begin to build it one baby step at a time. Your dream life won't be mine, but the important thing is that it be what you want it to be. Perfection is overrated, allow yourself the privilege of learning and doing and making mistakes. Life is but a vapor and passes so quickly, to be able to die well with as few regrets as possible takes effort. Monumental effort, for nothing worthwhile is ever easy. If I've ever encouraged you or influenced you, let it be in that.

Sunday, October 26, 2014

A Beneficial Barter

I grew up in the grape country of Western New York and though I've been away for a long while, my family still lives there. Where I live is moonshine country and after sending my almost 90 year old father a jar of Maraschino Cherries Stewed in Moonshine we decided to swap 'shine for grapes. My sister boxed up 35 pounds of Concord and Catawba grapes for me and shipped them down (incidentally, for less cost than what I could buy them for locally.) They arrived on Thursday last and by Friday we had them all jarred.
Steam Juicing the Grapes

35 pounds yielded 12 quarts of grape juice concentrate, 7 pints of grape jam, and 2 grape pies.


We are soaking the grape seeds and pulp in cider vinegar to extract the many benefits.

 A bit about grape seeds:
Although not particularly tasty, whole grape seeds are completely edible, and scientific evidence suggests that they are good for you, too. Packed with essential fatty acids, amino acids, and powerful flavonoids (such as proanthocyanidins), these little bitter seeds have been associated with a whole slew of health benefits. Eating grape seeds on a regular basis may, for example, improve cardiovascular health, reduce leg swelling and varicose veins, provide some protection against certain types of cancer, offer weight loss benefits, treat depression, and even fight yeast infections caused by Candida.
In addition, thanks to their remarkably strong antioxidant properties, grape seeds might (at least in theory) help fight certain skin conditions – such as inflammatory acne, psoriasis, and premature wrinkling of the skin – and some more serious health complications such as asthma, joint inflammation in rheumatoid arthritis patients, and problems related to eye health.
Whole grape seeds are naturally rich in flavonoids including gallic acid, catechin, epicatechin, gallocatechin, epigallocatechin, epicatechin 3-O-gallate, and perhaps most importantly, oligomeric proanthocyanidins. According to research, the antioxidant capacity of proanthocyanidins is 20 times greater than vitamin E and 50 times greater than vitamin C.
In addition, proanthocyanidins have beenshown to enhance the effectiveness of other antioxidants. As a result of the remarkably strong antioxidant power of proanthocyanidins, it is not surprising that supplement manufacturers have began to process grape seeds into pills and capsules.

Thursday, October 23, 2014

Autumn in a Jar

I just canned this:
It might be called Apple Pumpkin Butter by some, but I think the picture sums it up better.

Here is the recipe if you'd like to try it. Beware the smell as it cooks, if drifts everywhere and makes your home smell like a scented candle.

You will need:

  • I used one pretty good sized pie pumpkin, cut it in half, scraped the seeds & strings out, cut it into 2"x4" slices and shredded on my cheese shredder. This worked a lot better than trying to chunk it up. 
  • I added 3 Granny Smith apples, shredded. 
  • 2T vinegar
  • 1/2t salt
  • 1t nutmeg
  • 1T each, cinnamon and ginger
  • 2 cups brown sugar
  • 2 cups water and more if needed. 
Cook until done, adding more water if needed. My yield was 3 pints of very thick butter. 

The smell was divine, the taste was even better. I got the idea to make some from a book I'm reading, it's the Foxfire book detailing the life and interviews with Aunt Arie. She mentioned that they would make pumpkin butter in HUGE quantities and store it in multiple 5 gallon crocks. I find that mind boggling, my little batch was quite a bit of work, but to make gallons is nothing short of amazing. 

Happy Autumn!

Monday, October 20, 2014

Conservo Steam Oven

I've been looking for a Conservo for a little while, scouring eBay and local antiques shops to no avail. There are always a few on eBay, but for more than I wanted to pay relative to their condition. Using auction zip I found one being sold at an auction in Georgia, bid on it and won!

Made by the Toledo Cooker Company and patented in 1907 it is made with a tin body and copper bottom. The bottom, filled with water, generates the steam that bakes the items within. A nifty, low tech kitchen "appliance", my present to myself for my birthday.

It came today and I wanted to try it out immediately, but I couldn't think of anything to bake. I mused a bit and decided to use up a jar of our homemade peach pie filling and make a cobbler. I had to bake it in two bread pans because the Conservo can't hold a regular size cake pan.

I knew from a friend's experience with hers that anything baked with one will be very moist, but a cobbler should bake up just fine, right?

YES! Light, fluffy, moist, steamy goodness. Perfection.


Tuesday, February 5, 2013

The $7.32 Regency Dress

Each of the girls are getting a new dress this spring: Maggie got 2 1860s dresses, Abby got a late 1830s dress, Elisabethe's turn was skipped because her late 1840s pattern isn't ready yet so we jumped to Rebekah's turn. I wanted to do something different, the same old era gets tedious dress after dress, so I decided to give the Regency Era a go.

I looked at fashion plates and consulted Costume In Detail and Nineteenth Century Fashion In Detail and finally decided to make a drawstring, lightly gathered neckline and smooth elbow length sleeves. I didn't want to make a plain white gown, though they are far and away the most common kind to find examples of. I ended up finding a fabric at Wal-Mart with a white ground and blue figures that was $2/yard. I did find quite a few original printed dresses and genre paintings of printed dresses, among them were these:
 
Portrait of Jane Ann Campbell 1820
 
Girl's Dress 1815
 
14 year old Mary Ann Gale painted in 1815
 
Cotton dress 1805-1810
 
I took Rebekah's regular dress pattern and made it up in scrap fabric and then drew the new, further back shoulder seams in magic marker. Then I drew and redrew the slanting back seams to get the placement and angle right. I'm used to the curving back seams that were popular in the 1860s, whereas Regency seams are more of a straight line. Then I tweaked the armscye, cutting it in deeply at the back to give the illusion of a "small back" that was popular in this era. I cut the bodice apart on the marker lines and redrew the pattern with it, adding seam allowances.
When making up the dress I lined the bodice in a light weight cotton and piped the back seams. There is a casing at the neckline with a tiny 1/8" twill tape drawstring and self fabric buttons closing the rest of the back.
 
The sleeves were the hardest thing to draft of anything I've ever tried. I drafted and tried half a dozen incarnations of this sleeve before getting even remotely close. I looked at my Patterns Of Fashion book, but it wasn't very helpful. In the end I traced the whole sleeve opening shape by laying the dress flat and tracing it onto paper. I then stared at that for about five minutes thinking, "well that was brilliant, what do I do now?" And then a little line here, a little curve there and I came up with something passable, though not perfect. They are elbow length sleeves with the small amount of excess held in with 2 pleats and a self fabric button as trim.
The skirt is smooth across the front and full at the back, slightly gored and just above ankle length. The back skirt opening is made from a solid length of fabric, sliced open about 5" and turned under in a tiny hem. This was nice because then I didn't have to sweat matching the print like I would have if the skirt back was 2 pieces seamed up.

She really seems to like it.  :)  She has a bonnet to go with it which is as of yet untrimmed, hence no pictures, but I'm working on it.


Wednesday, December 26, 2012

Late 1830s Dress


Abigail's late 1830s dress is finally finished enough to get pictures of and blog about. Of all the historic eras that I've experimented sewing clothing for, the 1830s are by far my favorite. I love the wide necklines and gigot sleeves, it an aesthetic that I appreciate. Before the gigot sleeves were replaced by the slim sleeves of the 1840s, the gigot for a short time was banded or otherwise reduced at the bicep and flared out around the elbow. It doesn't seem like it's a very popular style to reproduce though, for whatever reason. I loosely based her dress on the 2 girls' dresses pictured in William Sidney Mount's 1840 painting The Blackberry Girls.


The
Blackberry Girls

I found this fabric at Wal-Mart for $2.50/yard and I squeaked it out of 3 yards. Romantic Era dresses really eat up the yardage.


The fabric is pleated at the bicep and then attached to the lower sleeve. There is self fabric piping at the armscye, between the upper and lower sleeves, at the wrist, binding the bertha collar and at the neckline. The pleats in the bodice are stitched in before the bodice is cut out, I don't know if that's a period technique or not.  :)


Instead of a ruffle I trimmed the collar with 100% cotton twill tape that I dyed dark brown. This is my first attempt at a bertha collar and I really like the way it turned out, it's a nice finishing touch.


There is a slim fitted undersleeve, cut on the bias, that the fashion fabric is tacked onto to give the pouf at the elbow. Without the undersleeve the pouf would fall down the arm and drag off the hand. Not the fashionable look we're shooting for. 

Godey's Ladies Book February 1838
 

Saturday, August 27, 2011

Weaving the Fabric

This post is a sort of continuation of my last post and an extension of some thoughts generated by some comments left.
I don’t intend to hammer away at people who own a food processor, Magic Bullet, vacuum cleaner or bread machine, but let me give you some sound reasons to put them away or use them less. We live in an age of unprecedented ease, never have such large amounts of people had to work as little as what we do. And yet, yet, we’re so unsatisfied. Something is missing from our lives; I touched on this in the post What Would You Give In Exchange? “Community” is a cry I’m hearing a lot, more people are waking up to the fact that truly no man is an island and they’re groping for a way to regain what was so carelessly tossed away by those of a generation or 2 ago. However, trying to rebuild community is putting the cart before the horse. Without the proper building blocks you can’t build anything that will last. The building block is the family and until the family is experiencing “community” you will never be able to replicate community on a larger scale. The best you’ll be able to do is to reenact it. Family community is built on need, Father and Mother need the children just as the child needs its parents and you can’t need somebody that you don’t know and never spend any time with. Let me present an example: we preserve a lot of food, right? :-) I’ve written about the tools that we use so you know that there isn’t a whole lot of mechanization being used here. Why would we choose to make it so hard on ourselves? Family community.


When we're making salsa somebody is washing tomatoes, Mr. G or Katie or Levi is cranking the Victorio Strainer, Elisabethe or Abigail is putting the tomatoes in the hopper, Aleks or I are dicing peppers, somebody else is cutting onions etc. We’re together, working to get an important job completed. It’s the same when we’re canning corn. Aleks picks it, Katie puts the water on to boil, Levi, Micah, Tabitha, Rebekah, Elisabethe and Abigail begin to husk it and remove the silk. Asa tastes the corn cobs to verify that they’re edible. And then Aleks, Katie and I cut it off the cob. Mechanization means not only noise that prohibits conversation, but it erases opportunities for us to work together. I need my children, we could not live this life without them and that needing them in turn grounds them to a real life. We're weaving more of the cloth that binds us together everytime we work together.

What kind of child abuse is it to turn a child loose to have their character shaped by their peer group? To substitute meaningful work for a virtual reality and passive existence: watching actors pretend to have relationships and act out immorality, listening to somebody else sing, watching other people play football, listening to somebody else read the Bible and explain their interpretation of it. Entire childhoods marked by passivity and then when they should be adults we wonder why they aren’t. We’ve set them up for failure by denying them a real childhood. “Fun” should be replaced by these two questions: is the task meaningful? and is it satisfying? Of course I’m not saying that we should never have fun, but it shouldn’t be a god that we worship. Enjoy spending time with your family, whatever your family happens to be; build that community first.
The two images shown are both of corn husking bees, the top image is a scene painted from the Island of Nantucket in 1876 and the bottom is a photograph taken at Hog's Jaw, a small community on the Cumberland River in lower Whitley County Kentucky about 1910. Friends and neighbors once gathered to help each other for such things as house raisings, quiltings, stir-offs, and bees. As it brought people together, it was considered as fun in those days and friends came from miles around. The work was often followed by a delicious meal and perhaps an evening of square dancing or games. Community building was happening all the time without there being any special effort to “create community”. Need compelled people to rely on each other, nobody was self sufficient but communities were to a large extent. If your very survival depended on your small town blacksmith, shop keeper, wagon maker, and midwife you would be much more careful to tend those relationships. We have so many more choices today that the “need” has been removed, or at least it appears so. But be not deceived, your survival still depends on others, they're just a nameless and faceless other that doesn't care about you as an individual. The Bible says that "My people perish for want of knowledge", you can apply that many ways to this situation, but it's not a stretch to say that God desires parents to work with and impart values to their children and also that He wants us to build communities.


Thursday, August 25, 2011

Domestic Economy


Summer is slowly, almost imperceptibly winding down; I can feel the change in the air though the workload is still as heavy as it ever was. We finally finished canning green beans, but the corn and carrots are far from done. We try to do a few canner loads every day and that way it isn't overwhelming and the jars do add up little by little. I'm thankful for the ease and convenience of having home canned foods on the shelf, meals can be made in a hurry and I know they're wholesome. I want to can some corn with red and green peppers in it, we'll add that to cornbread sometimes and we really like it that way. I also want to make a batch of salsa using all Green Zebra tomatoes, green salsa will be different and I do get tired of the same old things all the time. Home canning is a relatively recent invention, at least canning as we understand it today is- though people have been preserving food for later use since time immemorial. Our understanding of cooking has also undergone a radical change in the last hundred years. It’s rare today to find a woman who cooks meals for her family at home, much less a woman who has the knowledge of how to cook from scratch. We’ve gone from a nation of self reliant women to a nation of women who don’t cook or can’t cook anything more involved than Shake-n-Bake chicken and Stovetop stuffing. Obviously there are multiple nutritional benefits to cooking wholesome food from scratch, but there is also the satisfaction of knowing that you aren’t relying on Proctor & Gamble or SaraLee to decide what your family ought to eat.


By the same token, relying on a lot of "labor saving" devices might prove unwise if you are unable to cook without them. My "modern"kitchen equipment consists of a blender and a Victorio
Strainer (we just got the Victorio this summer). That’s it. All of the canning/preserving we do is done with those 2 tools, we dice all fruits and vegetables by hand and cut corn from the cob with a knife. We've canned 430 jars this summer so it is feasible to do all this without a lot of extra gadgets. Our philosophy has been to learn to do jobs the old fashioned way with the least sophisticated equipment and only then switch to more modern methods/equipment. If nothing else this certainly makes us appreciate how easy we have it! I think that it's a beneficial exercise to study old cookbooks and try to cook sometimes using these receipts and ingredients that our Foremothers would have used. Maybe we will never find ourselves in the position of needing to rely on these books and methods, but it's certainly better to be prepared and never need the knowledge than to find ourselves in a desperate situation with "if only" on our lips. Several receipt books that I enjoy perusing are Miss Beecher's Domestic Receipt Book 1850, The Great Western Cookbook 1857, The Frugal Housewife 1830 and The New England Economical Housekeeper 1845 . In addition to the usual recipes you will find directions for cutting up and preserving meat, keeping flies out of your house, remedies for illness, how to choose a domestic servant and other quaint advice. My plan is to print these books out and put them in pages protectors in a 3 ring binder, I prefer browsing through an actual printed book rather than on a computer screen. Today is the day to turn our energies toward acquiring useful skills that will serve our families whether it be canning or cookery, sewing or knitting, animal husbandry or gardening.

Monday, August 22, 2011

Sumac Lemonade

So Gentle Reader we find ourselves again prepared for another exciting installment of "Everything You Never Knew You Could Eat". That's right, Mrs. G- connoisseur of boring historical minutiae and purveyor of the same, is ready to conduct you on the first leg of your tour of edible weeds and scrub bushes.

I'm assuming that at least for those of you in the Eastern U.S. that the several varieties of Sumac are easily identifiable, yes? If not, stop right here and get some good field guides or do some internet research and before you eat anything be positive of what you're consuming. If you're bright enough to get yourself dressed and use a computer then you're intelligent enough to learn to positively identify Sumac. Poison Sumac tends to get all the press leaving its humbler cousins in obscurity, but differentiating between the poison and non-poison varieties is very easy. Smooth Sumac and Staghorn Sumac both have red berries, whereas Poison Sumac has white berries, simple. You can use both the Smooth and the Staghorn varieties pretty interchangeably but you should be aware that the Staghorn has more vitamin C than the Smooth. For this recipe I used Smooth Sumac because it is what was growing at the side of the road, "hey that's Sumac STOP THE TRUCK!" and Mr. G dutifully jumps out and twists off 6 berry clusters for me. Some sort of clippers or trimmers would have made the job easier by the way.

You will need to remove the berries as the stems give a bitter taste if you don't. The outer berries will come off easily but the inner ones don't, you can dehydrate the clusters to make removal easier and to store berries for the Winter. Because Sumac berries are high in vitamin C, higher than oranges even, you should keep plenty in reserve to combat colds this Winter. The Native Americans used Sumac extensively for this purpose.
You then boil 1 quart of water and pour it over 1 cup of berries and allow to steep for 15 minutes. Strain the tea through a cloth to remove all debris, sweeten with up to 1 cup of sugar and enjoy. If you've never imbibed Sumac before go easily at first as some people allegedly have a mild allergic reaction to it. The tea can also be combined with elderberry or red raspberries to make a jelly though I've never tried it.
As an aside, many folks on the survivalist forums recommend on stocking up on Vitamin C, but these people's idea of survival tends to involve generators and fossil fuels etc all in the attempt to maintain their current comsumer lifestyle. Our family's plan tends to center around learning to live without or learning to make our own reasonable substitutes and if you share that philosophy then Sumac meshes in nicely with that.